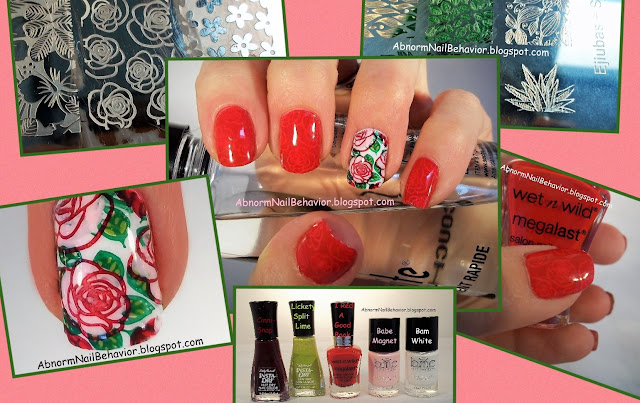
This is my first attempt at the layering technique reverse stamping and I have mixed feelings. There are several ways to do it but for my first try I wanted to see how it would come out without spending any money on a silicon mat. I layered my design directly on my rubber stamper. I didn't get pictures of the process but I will do a tutorial if I use this trick again.
I like the complexity of the colors with this style of stamping. This accent nail is actually several layers of polish starting with the red rose outline. I filled in the roses directly on the stamper with pink polish and a dotting tool. I added to that the leaf outline and after it was dry I filled in the leaves with a little green polish. Once all your layers are dry paint on a background color. I used white stamping polish. The tricky part is transferring the design to your nail covered in tacky top coat. Removing the extra polish took a while with an eyeliner brush and polish remover but it wasn't as messy as I thought it would be.

As for the rest of my nails I used a transparent red polish, stamped on the rose outline in white and then added a second coat of the red. The white just peeks out from underneath. This would work with any jelly polish over a white stamp.
Above are the polishes in this design. I used Konad special polish in green for the leaf outline but it didn't make the class photo.
Born Pretty Plate BPL-24.
Ejiubas + Sarah R2 Stamping Plate.
So for my first attempt at reverse stamping I think it went alright. As with anything practice goes a long way and nail polish is all about experimenting and practice.


No comments:
Post a Comment
Tell me what you think and share your thoughts with the rest of the AbnormNail crowd...